

Yúbal Fernández
WriterTech journalist with over eight years of experience. I specialize in mobile devices, PCs and consumer tech, as well as software and apps. Head of Xataka Basics, where everyone can find complex tech topics explained in an easy and accessible manner.
In this post, we’ll explain how to create a bootable USB drive to install Windows 11 on your PC. This method is particularly useful if you plan to install Windows 11 on a different computer that meets the minimum requirements.
You’ll have Windows 11 saved on your USB drive, which means you can install it on a different PC without having to download it directly on that machine again.
Making a bootable USB involves downloading the Windows installation files directly onto the USB drive, which needs to be formatted and free from write protection.

Bootable USB to Install Windows 11
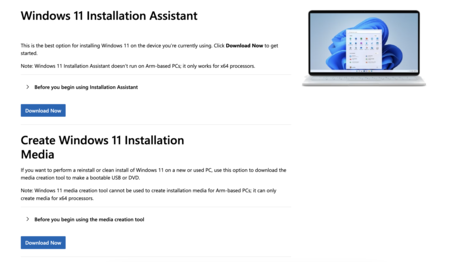
The first step is to visit the Windows 11 download and installation website. Once on the site, click the Download Now button under the Create Windows 11 Installation Media section. This will download an .exe file to your computer. Double-click on the file to launch it.
When you run the file, you’ll first see a screen indicating that preparations are being made. After a few seconds, you’ll reach another screen where you need to accept the notices and license terms. It’s a lengthy text, so it’s up to you whether you want to read it or not. In the end, you must accept the terms and click Accept to continue.
Next, you’ll see a screen where you can select the language and edition for the Windows installation. Your computer’s current settings will be pre-selected, and you generally don’t need to change them. However, if you wish to modify these options, you can uncheck the box that says Use the recommended options for this PC. When you’re ready, click Next.
On the next page, you need to select the USB flash drive option instead of the ISO file. Make sure your USB drive has at least 8 GB of free space to copy the Windows installation files.
You’ll then see a new window where you can select the USB drive you want to use from the list of connected devices. Once you’ve made your selection, click Next. If your USB drive doesn’t appear on the list, disconnect it and reconnect it to your computer. Then, click Refresh drive list to allow Windows to search for the device again. This process will erase all data on your flash drive, so ensure that you have backed up any important files beforehand.
After this, the app will begin creating your bootable USB drive. This process may take some time. It first needs to download the Windows 11 files and then copy them to the USB drive after formatting it. Depending on your Internet connection speed and your PC, it could take anywhere from half an hour to several hours.
Once the process is complete, you can safely remove the USB drive and use it on any other device you choose.
Image | Windows
Related | Thunderbolt vs. USB-C: A Breakdown of the Key Differences Between These Connection Technologies
Log in to leave a comment